Free Shadow Token (SHDW) Technical Analysis Signals
Shadow Token (SHDW) signal with technical analysis on 12 Feb
DEMA 3KAMA 1KAMA 2KAMA 3KAMA 4T3 Slope 2TEMA Price 1TEMA Price 2TEMA Price 3PLUS_DI Threshold 1PLUS_DI Threshold 2
Doji
Overall Strategy:
Buy Signals: 7
Sell Signals: 4
Neutral Signals: 88
Result: This strategy leads to a Neutral position.
Disclaimer! Please exercise caution and thorough consideration before making any financial decisions. It's important to note that our signals are based solely on daily price changes and do not take into account external factors such as news, market sentiment, or company developments. We strongly recommend considering all relevant factors and conducting your own research.
Useful Tips: To make the most informed decisions about your Shadow Token (SHDW) investments, we highly recommend visiting the "Magic Prediction" AI models signals website. They provide free signals, and if one aligns with ours, it is likely to be a reliable indicator, as we have observed over time.
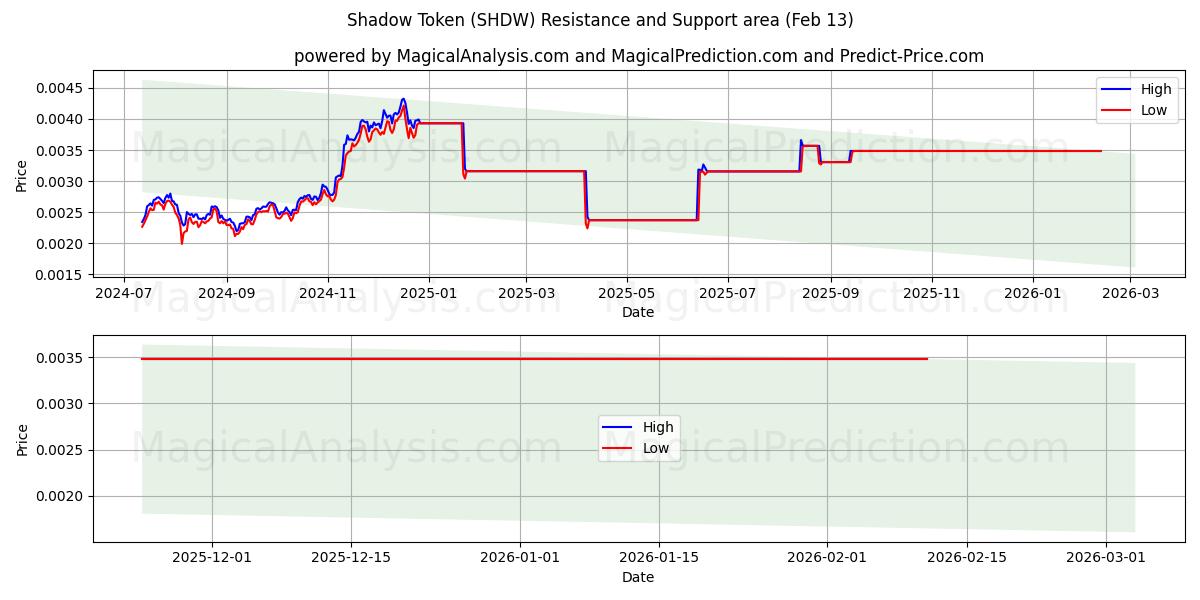
Second Support Level: 0.00224
If the first support level is breached, the second support level at 0.00224 becomes a critical point. Breaking this level would indicate stronger downward momentum, likely driven by market sentiment or external factors.
These support levels should be considered carefully in the context of broader market trends and indicators. Staying alert and consistently analyzing the market will allow you to make informed decisions while trading Shadow Token (SHDW). Paying attention to these support levels will help you adapt to the dynamic nature of the market and make smarter trading choices. It's crucial to closely monitor these resistance levels and consider them in the context of broader market trends and indicators. To make informed decisions when trading Shadow Token (SHDW), stay vigilant and continuously analyze the market. Focusing on these resistance levels, along with broader market dynamics, will help you make smarter trading decisions and adapt to the changing market conditions.
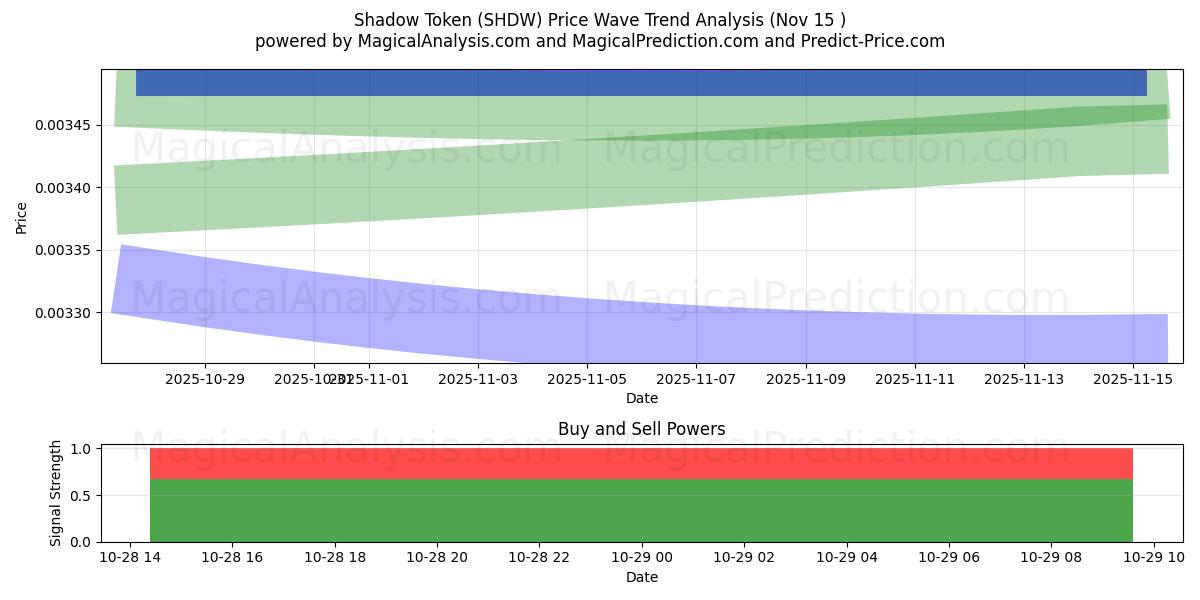
Shadow Token (SHDW) technical analysis chart
Shadow Token (SHDW) support and resistance levels
| Name | Level1 | Level2 | Level3 | Level4 | Level5 |
|---|---|---|---|---|---|
| Resistance | 0.00433 | -- | -- | -- | -- |
| Support | 0.00259 | 0.00224 | -- | -- | -- |


Shadow Token (SHDW) signals list for 12 Feb
| Overall Signals |
|---|
Shadow Token (SHDW) candlestick patterns on 12 Feb
Shadow Token (SHDW) technical analysis over the past days
| # | Date | Overal Signals | ALL Signals |
|---|---|---|---|
| 1 | 12 Feb | N | DEMA 3KAMA 1KAMA 2KAMA 3KAMA 4T3 Slope 2TEMA Price 1TEMA Price 2TEMA Price 3PLUS_DI Threshold 1PLUS_DI Threshold 2 |
| 2 | 11 Feb | N | DEMA 3KAMA 1KAMA 2KAMA 3KAMA 4T3 Slope 2TEMA Price 1TEMA Price 2TEMA Price 3PLUS_DI Threshold 1PLUS_DI Threshold 2 |
| 3 | 10 Feb | N | DEMA 3KAMA 1KAMA 2KAMA 3KAMA 4T3 Slope 2TEMA Price 1TEMA Price 2TEMA Price 3PLUS_DI Threshold 1PLUS_DI Threshold 2 |
| 4 | 09 Feb | N | DEMA 3KAMA 1KAMA 2KAMA 3KAMA 4T3 Slope 2TEMA Price 1TEMA Price 2TEMA Price 3PLUS_DI Threshold 1PLUS_DI Threshold 2 |
| 5 | 08 Feb | N | DEMA 3KAMA 1KAMA 2KAMA 3KAMA 4TEMA Price 1TEMA Price 2TEMA Price 3PLUS_DI Threshold 1PLUS_DI Threshold 2 |
| 6 | 07 Feb | B | DEMA 3KAMA 1KAMA 2KAMA 3KAMA 4TEMA Price 1TEMA Price 2TEMA Price 3PLUS_DI Threshold 1PLUS_DI Threshold 2 |
| 7 | 06 Feb | B | DEMA 3KAMA 1KAMA 2KAMA 3KAMA 4TEMA Price 1TEMA Price 2TEMA Price 3PLUS_DI Threshold 1PLUS_DI Threshold 2 |
| 8 | 05 Feb | B | DEMA 3KAMA 1KAMA 2KAMA 3KAMA 4TEMA Price 1TEMA Price 2TEMA Price 3PLUS_DI Threshold 1PLUS_DI Threshold 2 |
| 9 | 04 Feb | B | DEMA 3KAMA 1KAMA 2KAMA 3KAMA 4TEMA Price 1TEMA Price 2TEMA Price 3PLUS_DI Threshold 1PLUS_DI Threshold 2 |
| 10 | 03 Feb | B | DEMA 3KAMA 1KAMA 2KAMA 3KAMA 4TEMA Price 1TEMA Price 2TEMA Price 3PLUS_DI Threshold 1PLUS_DI Threshold 2 |
| 11 | 02 Feb | B | DEMA 3KAMA 1KAMA 2KAMA 3KAMA 4TEMA Price 1TEMA Price 2TEMA Price 3PLUS_DI Threshold 1PLUS_DI Threshold 2 |
| 12 | 01 Feb | B | DEMA 3KAMA 1KAMA 2KAMA 3KAMA 4TEMA Price 1TEMA Price 2TEMA Price 3PLUS_DI Threshold 1PLUS_DI Threshold 2ADXR with DI+/DI- |
| 13 | 31 Jan | B | DEMA 2DEMA 3KAMA 1KAMA 2KAMA 3KAMA 4TEMA Price 1TEMA Price 2TEMA Price 3PLUS_DI Threshold 1PLUS_DI Threshold 2ADXR with DI+/DI- |
| 14 | 30 Jan | B | DEMA 2DEMA 3KAMA 1KAMA 2KAMA 3KAMA 4T3 Slope 2TEMA Price 1TEMA Price 2TEMA Price 3PLUS_DI Threshold 1PLUS_DI Threshold 2ADXR with DI+/DI- |
| 15 | 29 Jan | B | DEMA 3KAMA 1KAMA 2KAMA 3KAMA 4T3 Slope 2TEMA Price 1TEMA Price 2TEMA Price 3PLUS_DI Threshold 1PLUS_DI Threshold 2ADXR with DI+/DI- |
| 16 | 28 Jan | B | DEMA 3KAMA 1KAMA 2KAMA 3KAMA 4TEMA Price 1TEMA Price 2TEMA Price 3PLUS_DI Threshold 1PLUS_DI Threshold 2ADXR with DI+/DI- |
| 17 | 27 Jan | B | DEMA 3KAMA 1KAMA 2KAMA 3KAMA 4T3 Slope 2TEMA Price 1TEMA Price 2TEMA Price 3PLUS_DI Threshold 1PLUS_DI Threshold 2ADXR with DI+/DI- |
| 18 | 26 Jan | B | DEMA 3KAMA 1KAMA 2KAMA 3KAMA 4T3 Slope 2TEMA Price 1TEMA Price 2TEMA Price 3PLUS_DI Threshold 1PLUS_DI Threshold 2ADXR with DI+/DI- |
| 19 | 25 Jan | B | DEMA 3KAMA 1KAMA 2KAMA 3KAMA 4T3 Slope 2TEMA Price 1TEMA Price 2TEMA Price 3PLUS_DI Threshold 1PLUS_DI Threshold 2ADXR with DI+/DI- |
| 20 | 24 Jan | B | DEMA 2DEMA 3KAMA 1KAMA 2KAMA 3KAMA 4TEMA Price 1TEMA Price 2TEMA Price 3PLUS_DI Threshold 1PLUS_DI Threshold 2ADXR with DI+/DI- |
| 21 | 23 Jan | B | DEMA 2DEMA 3KAMA 1KAMA 2KAMA 3KAMA 4TEMA Price 1TEMA Price 2TEMA Price 3PLUS_DI Threshold 1PLUS_DI Threshold 2ADXR with DI+/DI- |
| 22 | 22 Jan | B | DEMA 2DEMA 3KAMA 1KAMA 2KAMA 3KAMA 4TEMA Price 1TEMA Price 2TEMA Price 3PLUS_DI Threshold 1PLUS_DI Threshold 2ADXR with DI+/DI- |
| 23 | 21 Jan | B | DEMA 3KAMA 1KAMA 2KAMA 3KAMA 4TEMA Price 1TEMA Price 2TEMA Price 3PLUS_DI Threshold 1PLUS_DI Threshold 2ADXR with DI+/DI- |
| 24 | 20 Jan | B | DEMA 2DEMA 3KAMA 1KAMA 2KAMA 3KAMA 4T3 Slope 2TEMA Price 1TEMA Price 2TEMA Price 3PLUS_DI Threshold 1PLUS_DI Threshold 2ADXR with DI+/DI- |
| 25 | 19 Jan | B | DEMA 3KAMA 1KAMA 2KAMA 3KAMA 4T3 Slope 2TEMA Price 1TEMA Price 2TEMA Price 3PLUS_DI Threshold 1PLUS_DI Threshold 2ADXR with DI+/DI- |
| 26 | 18 Jan | B | DEMA 2DEMA 3KAMA 1KAMA 2KAMA 3KAMA 4TEMA Price 1TEMA Price 2TEMA Price 3PLUS_DI Threshold 1PLUS_DI Threshold 2ADXR with DI+/DI- |
| 27 | 17 Jan | B | DEMA 2DEMA 3KAMA 1KAMA 2KAMA 3KAMA 4T3 Slope 2TEMA Price 1TEMA Price 2TEMA Price 3PLUS_DI Threshold 1PLUS_DI Threshold 2ADXR with DI+/DI- |
| 28 | 16 Jan | B | DEMA 3KAMA 1KAMA 2KAMA 3KAMA 4T3 Slope 2TEMA Price 1TEMA Price 2TEMA Price 3PLUS_DI Threshold 1PLUS_DI Threshold 2ADXR with DI+/DI- |
| 29 | 15 Jan | B | DEMA 3KAMA 1KAMA 2KAMA 3KAMA 4T3 Slope 2TEMA Price 1TEMA Price 2TEMA Price 3PLUS_DI Threshold 1PLUS_DI Threshold 2ADXR with DI+/DI- |
| 30 | 14 Jan | B | DEMA 3KAMA 1KAMA 2KAMA 3KAMA 4T3 Slope 2TEMA Price 1TEMA Price 2TEMA Price 3PLUS_DI Threshold 1PLUS_DI Threshold 2ADXR with DI+/DI- |
Users forecasts for Shadow Token (SHDW)
What is your prediction?
In this section, you can easily predict without user registration. See also other users predictions.
